SharePoint 2013: Customizing List Forms
 SharePoint 2013: Customizing List Forms
Understanding Forms in SharePoint
Creating a SharePoint List from an Excel Table
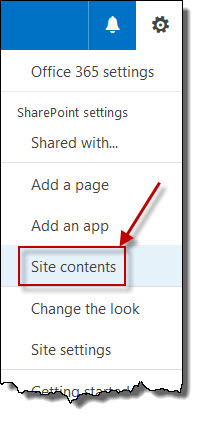
Create a subsite called SP Forms. To do this, from your SharePoint site, click on the Gear.

Click on Site contents.
Scroll down to the bottom of the list of apps until you see Subsites. Click on new subsite.

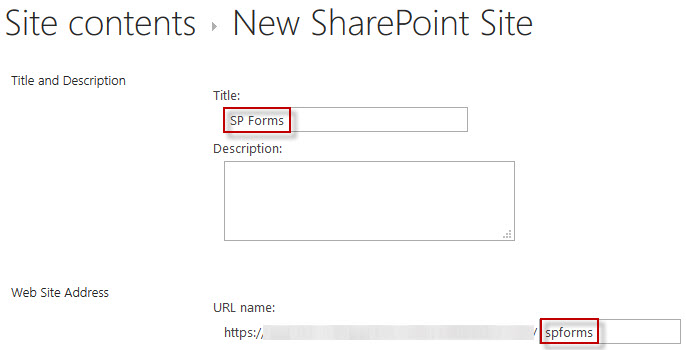
For the title, enter the value SP Forms. For the URL name, enter the value spforms. Click on Create button.
First, we will create a SharePoint list using an Excel 2016 worksheet.
The Excel worksheet must be formatted as a table. To do this, open Excel. Select all of the cells that are considered to be part of a table including the column headers. Then from the menu bar, select Home, then select Format as Table.

To verify it is a table, when you select a cell on your worksheet, you should have the option to export your data to a SharePoint List. Let's proceed with exporting the data to a SharePoint List. Click on Export Table to SharePoint List...

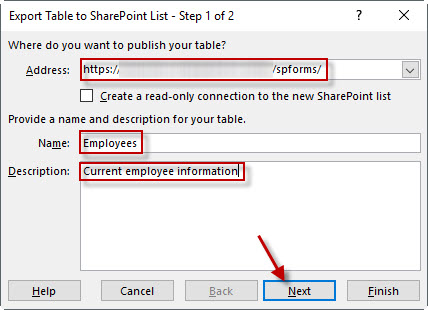
On the first dialog, enter the information as shown here. When the information has been entered, then click on Next.
At this point, Excel is attempting to connect to the specified SharePoint site. This could take a few moments.
If you see the following message, it may mean that you are attempting to upload data from a system that is not secure. Perform this operation from a system, or computer, that is part of the network.

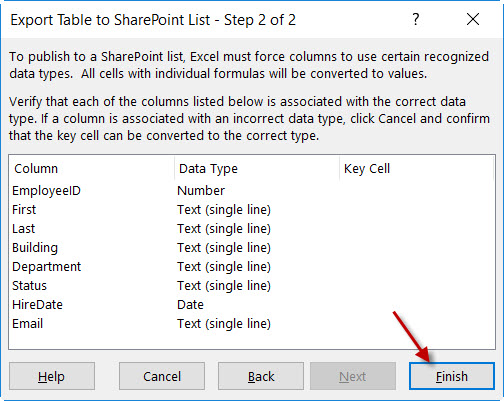
When it has connected, you will then see Step 2 of 2. Review the information on this dialog. Ensure that the data types that are shown are correct. If any of the data types are not correct, Cancel out of the form and fix the Excel spreadsheet. This is not something you can fix later in SharePoint. If the information is correct, then click on Finish.
Once it is completed, you should see the following dialog. If you wish to view the SharePoint list, click on the link. Otherwise, click on OK.
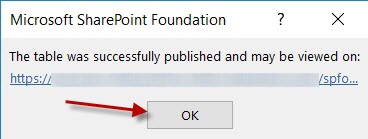
You now have a list in SharePoint that was sourced from an Excel worksheet.
View the Default List Forms in SharePoint
When a list is created in SharePoint, two views and three forms are automatically created. The forms are called Default forms.
The first default form is used when a new item needs to be created in the list. It is known as the New Item form. The name of the file at the time of creation is NewForm.aspx.
The second default form is the Edit Item form.The name of the file at the time of creation is EditForm.aspx.
The third default form is the Display Item form. The name of the file at the time of creation is DispForm.aspx.
The views that are available are the following:
- Standard view
- Quick edit view
Best users for default forms
- Simple lists for applications
- Small number of columns
- Simple functionality
Setting Options for Default List Forms
It is possible to modify the default forms by changing the list settings underneath the form. This includes the following changes:
- Change field order
- Validate user input
- Basic formatting
- Calcualte values
- Attachments
It is also possible to add a Web Part to the top of each of the default forms.
Ways to Create SharePoint List Forms
There are ways to create forms in SharePoint. This includes:
- Create a new list app in SharePoint
- Export data to a SharePoint list
- Excel
- Access
- The forms that are created are not easy to modify and are plain looking.
- Create SharePoint list forms with InfoPath Designer
- Design Access forms for an Access web app
- Excel Survey
- Create aspx forms with SharePoint Designer
- Create aspx forms with Visual Studio
- Use a third-party form creation tool
- K2
- Ninetex
- Formotus
Using InfoPath to Create List Forms
Create the Departments and CurrEmployees Lists
In this section, we will focus on the creation of lookup lists. In this section, we introduce the creation of a Departments list and a new Employee list that does not import a Departments column.
Opening the Default Form with InfoPath Designer
To open a default using InfoPath, navigate to your list. From the toolbar, click on the LIST tab. Look in the Customize List area and click on Custommize in InfoPath.

This action will load InfoPath and open a form. And as you can see, the form seems to list the fields in a different order.
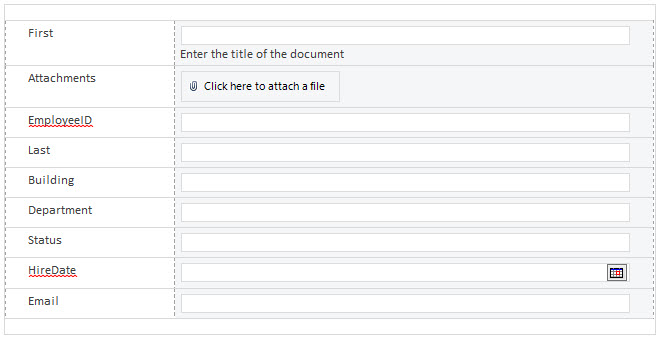
We now have access to a number of tools to modify the form.
Modifying Form Layout
From the form shown above, you can make some small modifications, like adding spaces to the labels, to make them more readable. Or you can do something more dramatic like choosing a new layout. To do that, you need to click on INSERT and then click on the drop down for table layout examples.

This will give you lots of options. Let's choose the Two-Column Stacked 3 layout.

It now looks like this.
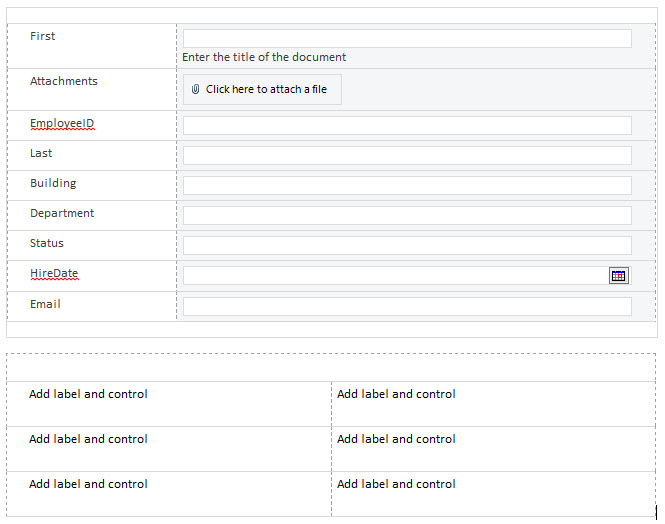
To add the fields to the table that was just inserted, this can be one of two ways. First, the controls can be dragged down from the upper form to the lower form. Second, the fields can be dragged from the Fields list on the right. Let's drag the first name to the upper left cell on the table.
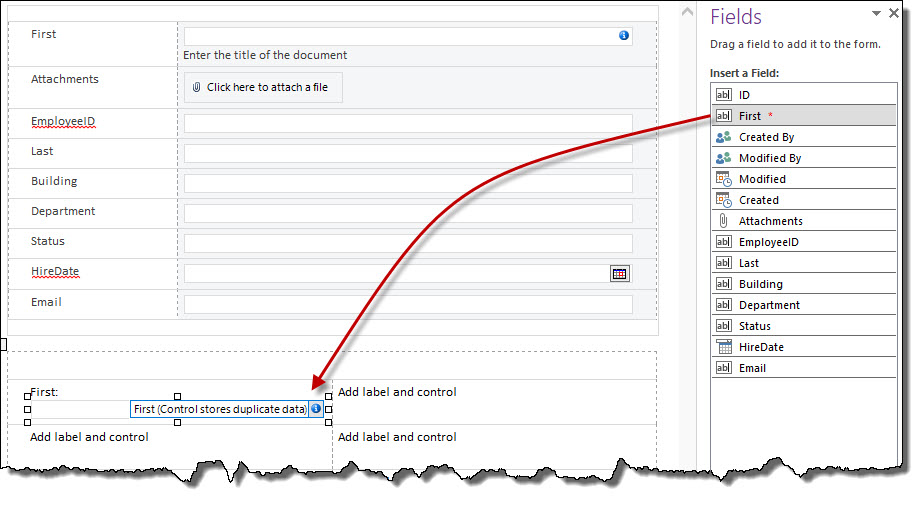
Add the Last field to the upper right cell.
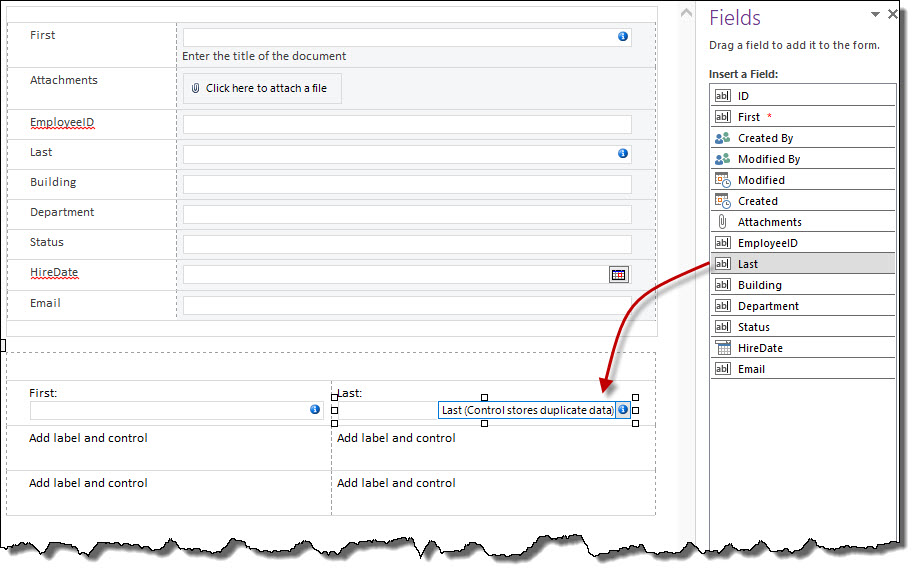
Remove the two fields from the upper table. This includes the First and Last fields. This is done by selecting the field and pressing the Delete button.
If you choose to drag the fields from the upper table to the lower table, you do not get the automatic labels for the controls. You will need to add that yourself by simply typing. Drag the Email and Department fields to the lower table and add the labels.
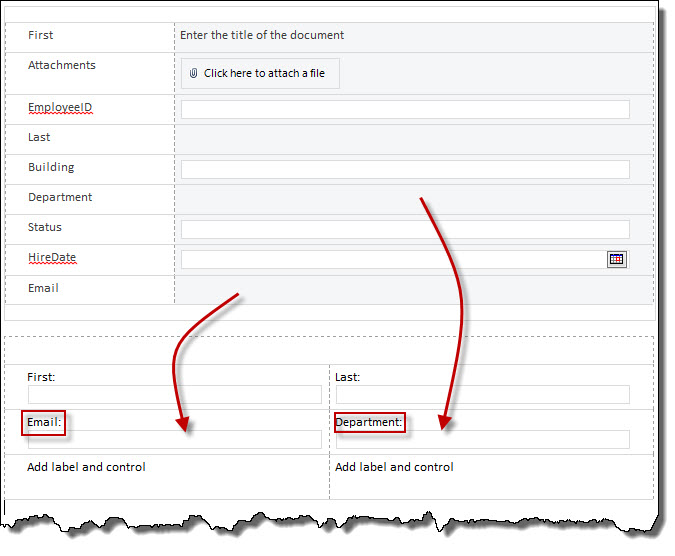
Next, let's add a heading.
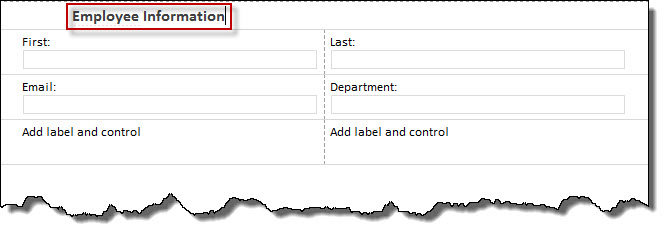
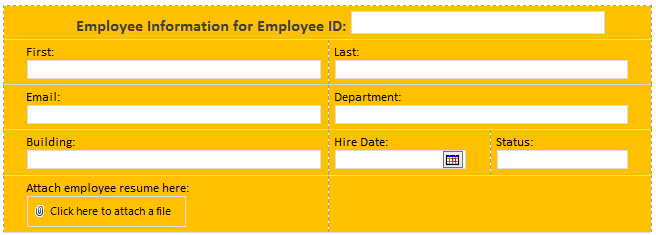
Make the rest of the changes until you have this form and delete the original table.
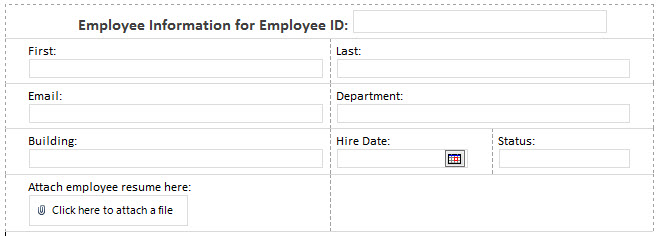
You can add some shading by clicking on the table, selecting LAYOUT, and the Shading.
.ico)