Printing Photos
Printing Photos
If you have a frame that needs a photo, follow these steps to print a photo to the correct dimensions needed to fill that frame.
Size Does Matter
Using a ruler, determine the size of the picture that needs to be placed in the frame. This means opening the frame and taking the exact measurements of image needed to fill it. The first number is the width and the second is the height. Make your measurement using United States customary system, or inches.
As an example, the image we need to fill a frame is 10 7/8" x 8 3/8".
Locate the image you would like to use. Don't worry about its current size. It is most likely too big. That is okay.
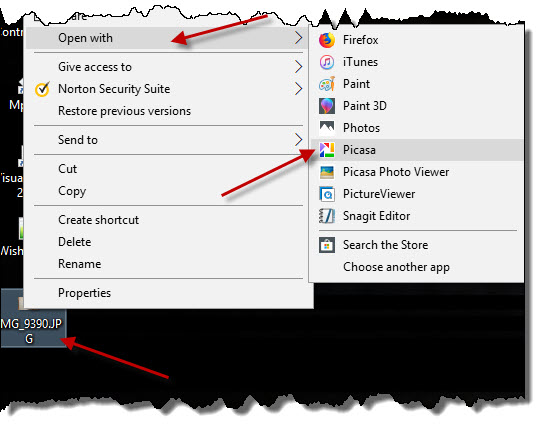
Open the image using Picasa. To do this, right mouse click on the image and select Open with >, followed by Picasa.
With the photo open in edit mode, perform any Straightening the image may need.
The next step is to Crop the image to the right ratio. Click on the Crop button.
In the drop down list of sizes, look for the image size you need. If the size you need is not present, add the size by clicking on Add Custom Aspect Ratio... in the drop down box. It is at the bottom of the list.
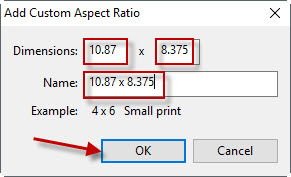
In the Add Custom Aspect Ratio dialog box, enter the dimensions. The first number should be the width and the second number should be the height. The dialog box does not accept fractions. Therefore, any fractions you may have in your dimensions must be converted to real numbers. Give the new ratio a name. For the current example, this is what the dialog box would look like:
Visit the website https://www.unitconverters.net/typography/inch-to-pixel-x.htm to convert the inches to pixel values. For this example, the value of 10.87 inches is equal to 1043.52 pixels and 8.375 inches is equal to 804 pixels.
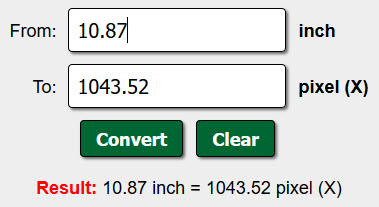
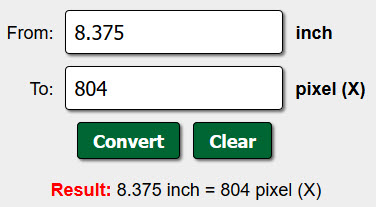
Of the two pixel values, select the one that is the greatest. In this example, since 1043.52 is greater than 804 pixels, select the 1043.52 value.
Back in Picasa, click on the Export button at the bottom of the window.

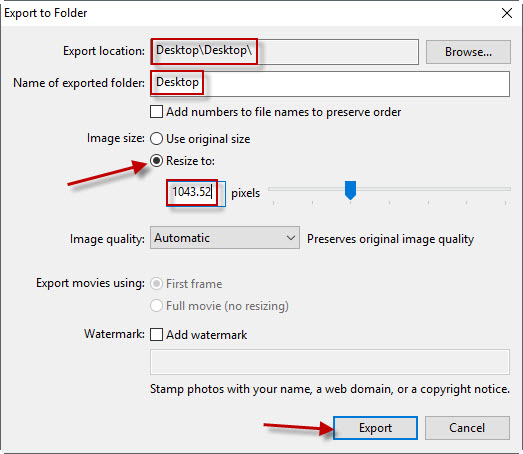
On the Export to Folder dialog, enter the Export location and Name of export folder as shown below. For the Resize to text box, enter the largest of the two pixel values. In this example, that would be the value of 1043.52. Click on the Export button.
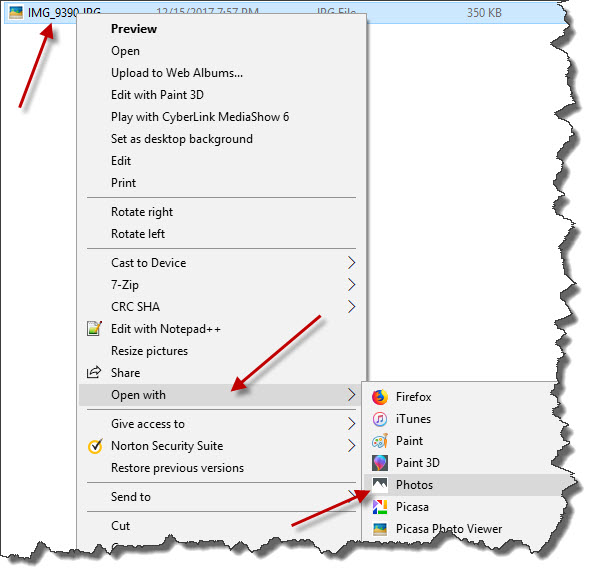
After exporting the image to the folder, the folder location will open. Navigate to the image in the Desktop folder. Right-mouse click on the image and select Open with >: followed by Photos. This will open the photo using the Windows Photo application.
Make sure your printer is powered on and has the photo paper loaded. Make note of the photo paper size and photo paper type. Click on the Print icon.

For the Paper size, select the size of the paper in the printer.
For the Paper type, select the type of photo paper being used.
Click on Print button.
.ico)